
Let’s start using your Organics Collector!
We’re excited to help you make organic waste disposal easier and more sustainable. This page will take you through every step to get your OC set up and help you understand how everything works.
Let’s start using your Organics Collector!
We’re excited to help you make organic waste disposal easier and more sustainable. This page will take you through every step to get your OC set up and help you understand how everything works.
Learn how to quickly unpack and set up your device for the first use.
Discover the basics and start using your OC right away.

Adjusting the lid position
Additionally, you may want to change the feeding opening lid from left to right for convenience.
For more details on how to install the device in different configurations, please refer to the user manual below.
What does  accept?

Fruit peels


Coffee grounds

Rotten fruits/vegetables
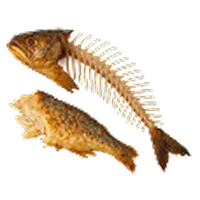
Fish and seafood

Vegetable scraps

Egg shells

Leftover food

Meat bones
What can’t you put in the

Liquids
Soups, Juices, Water

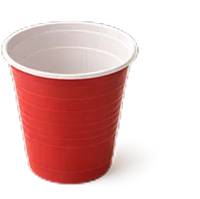
Non - compostable waste
Plastic Cup, Plate, Paper


Large amounts of meat, cheese, and yogurt

Large volumes of fat
Oil, butter, margarine


Other recyclable waste
Metal, glass


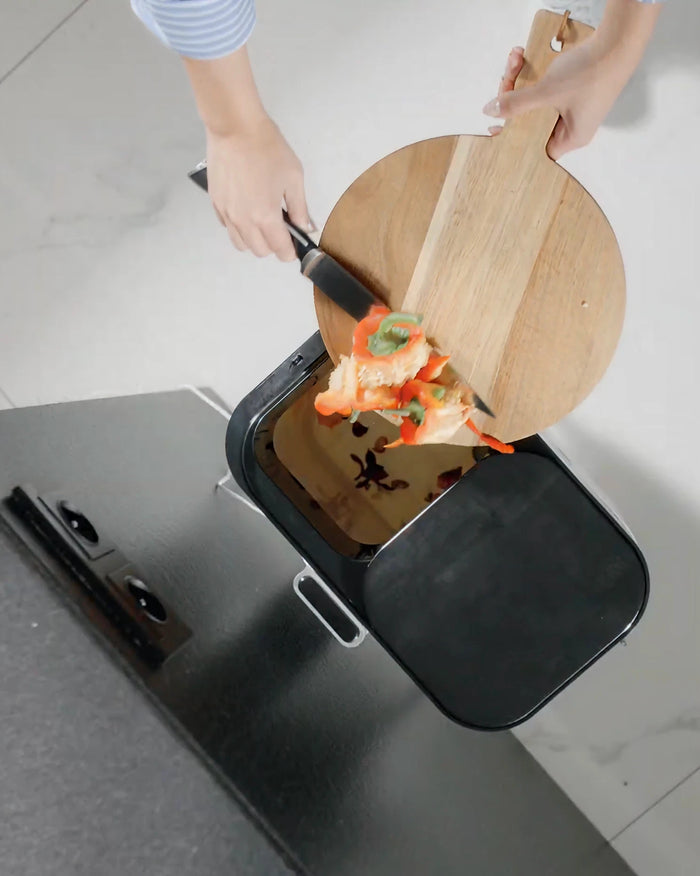
Easy waste disposal in a few simple steps
You can easily add waste without hassle, while the system naturally preserves its composting properties.

Keeping your OC clean
The OC is designed to store food scraps, which can quickly contaminate it. Regular cleaning is important to maintain theOC’s functionality and hygiene.

Your OC needs to start fresh - replace your filter
The filter typically lasts up to 3 months with regular use. However, the lifespan may vary depending on the moisture level and type of organic waste. To ensure optimal filtration quality, we suggest replacing the filter every 3 months.
Order additional filters and keep your organic waste storage efficient.

Cause → Solution
1. The power cable of your Clear Drop® Organics Collector is not fully connected. → Reconnect the plug securely into the power jack.
2. The food waste collection device may have an internal electronics issue or power supply failure. → Contact Clear Drop Support for diagnostics at support@onecleardrop.com
Cause → Solution
1. The proximity sensor is dirty. → Turn off your Organics Collector (OC), wipe the motion sensor, and test again.
2. The gear is dirty. → Turn off the device, remove the lid, and clean the mechanism gently to restore proper motion.
3. Ozone sanitizing mode is active. → If the LEDs are blue, your OC is sanitizing; the lid remains closed for safety until the process ends.
4. The lid drive motor may be damaged (buzzing sound). → Contact Clear Drop Support at support@onecleardrop.com for assistance.
5. The lid is not properly closed. → Remove and place it back correctly.
Cause → Solution
1. The activated carbon filter inside your Clear Drop OC may be expired. → If you have not replaced the filter in over 3 months, you may need to replace it.
2. Filter is not on it's position or is not fully locked in. → Reinstall the filter securely for proper odor control.
3. Strong-smelling organics such as seafood or meat scraps were added. → Activate “Intense Mode” to enhance ozone deodorization. The odor will fade within a few hours.
4. The ozone generator may need service. → Contact Clear Drop Support for diagnostics at support@onecleardrop.com
Cause → Solution
1. The device hasn’t been used for an extended period or is too cold (below optimal operating temperature 50°F-104°F). → Place your OC in a roomat normal temperature and humidity (≤70%), wait 1–2 hours, and retry.
2. The gas spring might be defective or stuck. → Contact Clear Drop Support for diagnostics at support@onecleardrop.com

Everything that is organic and fits through the receptacle can be stored in your Clear Drop® Organics Collector (OC). The unit is designed to be fully integrated with outdoor or large-scale composting ystems, allowing you to pre-collect organic waste indoors safely and without odors.
It’s a perfect solution for home food waste pre-composting, helping you keep your kitchen clean and compost-ready before transferring waste outside.
If you’d like to learn how indoor composting complements outdoor compost bins, read our guide “Composting: electric vs. professional or traditional options”.
Our approach is totally different from standard home-composting systems. While electric composters speed up decomposition, they consume much more energy and require frequent maintenance.
The Clear Drop® OC is not a composter but a low-energy food waste collector that fits into the ZeroTrash® lifestyle — focused on ease, cleanliness, and sustainable pre-recycling. It stores organics for up to a week, keeping them odor-free and ready for composting or industrial recycling.
Learn more about how Clear Drop is changing home waste management in “Clear Drop: how we’re revolutionizing home waste management”.
The OC consumes very little power — only 5.1 kWh per month, or roughly $0.84, making it one of the most energy-efficient indoor pre-composting devices available.
Its smart ventilation and low-power system make it ideal for sustainable households aiming to reduce both carbon footprint and utility costs.
Discover more about energy-saving waste solutions in “Soft plastic recycling: key challenges and solutions”.
To remove the bin:
The OC bin is lightweight and ergonomically designed for quick emptying and cleaning, ensuring a hygienic recycling process.
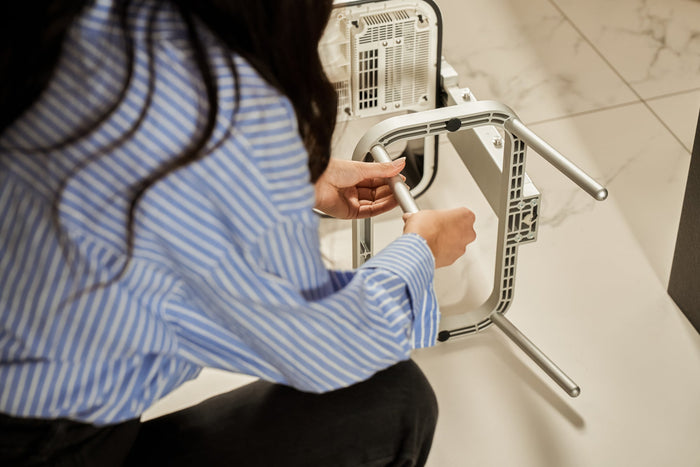
If you’re placing the device on the floor, follow these steps to attach the four metal legs:
Step 1: Choose a location.
Select a spot within 5 feet (1.5 m) of a wall outlet.
Step 2: Prepare the device.
Unplug it, remove the cover, turn it upside down, and place it on a flat surface.
Step 3: Attach the legs.
Screw in each leg one by one into the holes at the bottom of the frame.
Legs without rubber pads should be positioned closer to the stand.
Once assembled, turn the OC upright and place it in your chosen location.
Learn more about system adaptability in “Fixing the broken recycling system: why Clear Drop® exists”.
Choose a mode based on the type of food waste and your environment:
Simply tap the button to switch between modes as needed.
Simply place your organic waste inside from a plate or cutting board - the lid will automatically slide open and close, then start the drying process.
The OC is designed to operate reliably in a variety of indoor conditions. It works best at temperatures between 34°F and 90°F and in environments with humidity levels of up to 70%. To ensure optimal performance, avoid placing the device in extremely hot, cold, or humid areas, such as unheated garages or outdoor spaces.
Your OC is designed to fit seamlessly into your kitchen with three versatile setup options. Choose the one that best suits your space and needs:
For a freestanding setup, attach the four metal legs:
Simply place the OC on your kitchen counter—no installation required. Keep additional accessories nearby for easy access.
Save counter and floor space by mounting your OC on a sturdy vertical surface using the included bracket.
Installation Steps:
Important: The enclosed screws are designed for wood and wood-based materials. If mounting on other surfaces, use the appropriate fasteners.
Note: The OC is not designed for installation inside a kitchen cabinet, as the contactless sensor may be triggered unintentionally in enclosed spaces.
Yes, you can rotate the OC head for a more convenient setup and even switch the feeding opening lid from left to right. To do so, follow the steps outlined below:
How to Rotate the OC Head:
Once completed, your OC is now set up in the reversed orientation, ready for use!
It's not necessary! After emptying the bin, you can simply wipe it down or clean it if needed.
If you'd like, you can use compostable bags that are designed for organic waste. Avoid using plastic bags as they won't break down with the organic waste.
Once the food waste is dried, it’s lightweight, odor-free, and ready for composting. You can dispose of it in your municipal compost bin or add it to your outdoor compost.
This step helps reduce methane emissions and supports sustainable waste management.
Since the bin stores food scraps, regular cleaning is essential to keep it hygienic and working properly.
Cleaning the bucket
We recommend cleaning the bucket each time you empty it.
Use a plastic-safe cleaner like dish soap, dishwasher liquid, or a mild household cleaner.
Follow the instructions on your cleaner’s label before reinstalling the bucket.
Cleaning the top panel & lid
The lid and top panel can get dirty over time. Simply lift off the lid (no need to turn off the device) and wash it or wipe it down with a damp cloth.
Clean the top panel with a mild detergent and a damp cloth, then place the lid back in position.
Additional tips
Avoid excessive liquids on or around the top of the device, even though the electronics are isolated.
Do not use harsh or abrasive detergents, as they may damage the plastic.
If the bottom of the top part becomes dirty, remove the bucket and sweep the grill with a dry brush.
Yes. The ozone sanitizing system periodically activates to prevent bacterial growth and neutralize odors.
During the brief sanitizing cycle, you may see a blue LED and hear a faint sound — that’s the safe ozone generator at work.
The OC has passed ETL safety certification and meets North American health and home appliance standards.
For details on how Clear Drop® ensures eco-safe technology, read “Fixing the broken recycling system: why Clear Drop® exists”.
The activated carbon filter lasts about 3 months with normal use, depending on humidity and waste type.
Replacing it regularly maintains odor control, airflow, and hygiene inside the OC.
Simply remove the old filter and insert a new one — order a new one on our website.
We’d love to hear from you! Share your questions, product ideas, or sustainability suggestions at support@onecleardrop.com
Together, we can make everyday recycling simpler and more impactful.
